Getting into 3D Printing with the Ender-3 S1
Oh boy, not another hobby…
…yes, it is another hobby. I recently took a 3D modeling and printing course which took radiology scans and transformed them into anatomically accurate 3D-printed models. Having little experience with the 3D printing part, I had a lot of difficulty dialing in the correct settings to prevent imperfections in my prints, especially as I was using different printers each time.
Conveniently, Micro Center had a sale on the Creality Ender-3 S1 printers for $70, an unbelievable value. Logically, I promptly took one home.
Why a Creality printer in 2024?
Creality, the brand that produces the Ender-3 S1, is well-known for releasing the Ender-3 printer back in 2017. Owing to its low price at the time (sources quote “the shocking price of under $300 USD”) while delivering good performance compared to competition, the Ender-3 was very successful, and its name still carries on in the S1 model I purchased.
Despite the strong brand recognition of Creality, its latest products haven’t quite measured up to its competition in the budget segment, which now primarily comes from Bambu Labs. The Bambu Labs A1 mini, now at a permanent price drop of $200, is commonly cited as the best plug-and-play printer for folks who simply want a printer that works out of the box. In most cases it really doesn’t make sense to purchase any of Creality’s offerings seeing as the A1 mini has so many convenient features such as auto bed leveling, auto Z axis offset, and belt tensioning.
In my case, I wanted a printer where I could learn about why 3D prints go wrong as a couple had of my own at my university’s makerspace, as well as a larger (normal) bed size. (I tell myself now that a lot of the fun is in tinkering with the machine itself, but check back in a couple of months and that might not be the case.)
Setting Up the Ender 3-S1
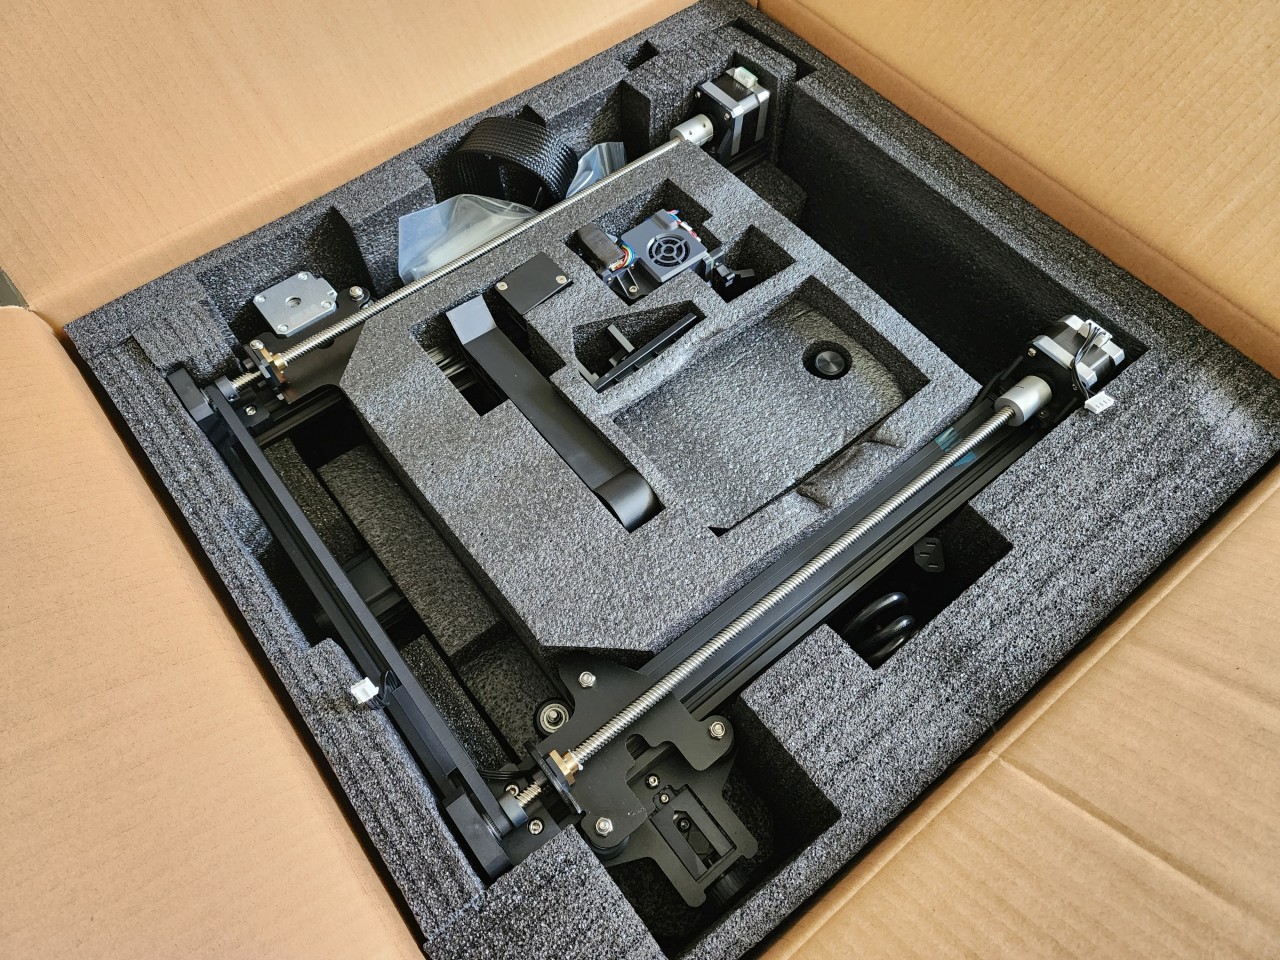
The printer was well-protected in soft foam. The aluminum extrusions and other parts feel hefty and totally worth the $70 price tag, even if not being purchased as a standalone printer.

I went ahead and took off the bottom cover to reveal the mainboard, taking note of the chip (in my case, a STM32F401). This is relevant as I wanted to ensure compatibility with custom firmware.
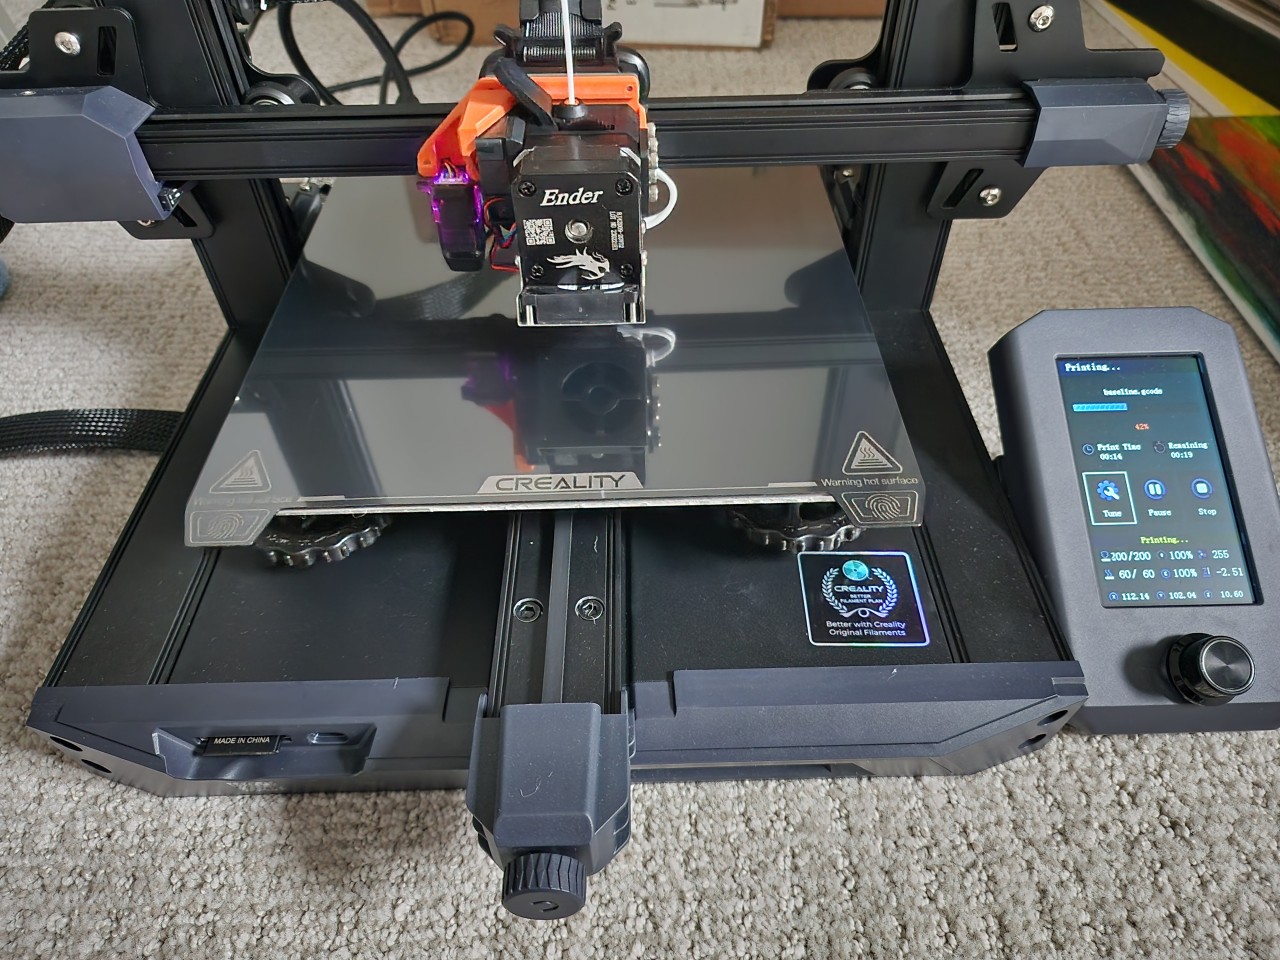
I followed this YouTube video to help assemble the printer. After attaching the gantry (i.e. frame that supports the printer head) to the base and attaching the screen, I installed my first mod for the printer. The Zero Y-Offset Mod alleviates issues associated with the printer bed calibration probe being offset on the y-axis relative to the printer nozzle head. Installing this requires unscrewing three screws that secure the motherboard to the Sprite extruder unit and one screw near the hotend fan, as well as the two screws that secure the CRTouch to the default bracket. This mod was initially printed in PLA, but this can spontaneously crack, so I replaced it with a PETG version later.
After installing the extruder head and plugging in the wires, it was time to start calibrating the machine. I carefully tuned the eccentric nuts on the rails so that could freely move when turned by hand but that there was no wobble to any components. I roughly tuned the belts to their innate frequency when plucked based on this interesting blog post, which is 113 Hz for the y-axis belt and 94 Hz for the x-axis belt. Finally, I also added generic silicone spacers from Amazon to replace the default springs, which should help keep my bed leveled at the same spot for longer. These should either all be 18 mm in height, or should be ordered in a set of two, as one of the spacers for the original Ender 3 is slightly shorter than the others.

To unlock some further features of the printer, I upgraded the firmware to the Marlin V2-based “Professional Firmware”. For my printer, I downloaded the latest firmware with support for the F4 chip and UBL (a feature that enables correction for slight leveling deviations in the printer bed) and copied it into a folder named STM32F4_UPDATE in the root of the card before flashing it.
Just to get here was a lot of steps, which is another point in favor of Bambu printers if you want something that just works out of the box.
Fine-Tuning
After all of this, I still needed to fine-tune the printer firmware and my slicer software to get the best quality prints. First, I heated the bed to the appropriate temperature of my filament (60°C for PLA) and adjusted the bed leveling screws until they were adequately leveled. I did this by unscrewing them loose all the way and then spinning them freely until they stopped. I then tighted each of them equally by a couple of turns.
In my printer’s firmware, I did the following steps:
- In Advanced → Probe Settings, changed the probe x- and y-offsets as adjusted by the zero y-offset mount (-45.0 on the x, and 0.0 on the y).
- In Advanced → Mesh Leveling → Mesh Inset, clicked Maximize Area, then Center Area.
- Returned to the previous menu (Mesh Leveling) and increased the number of x and y mesh points to seven each.
- In the Mesh Leveling menu, adjusted the bed temp for my current filament type (60°C for PLA).
- In the Mesh Leveling menu, started the Auto Build Mesh process, and saved the mesh. (It might be bad at this point but it’s not really an issue, you can re-do this once the bed is leveled even more.)
- Following this, returned to the Advanced menu and stored the settings.
After these first steps, I followed Teaching Tech’s 3D printer calibration site, focusing on the PID autotune steps, extruder E-step calibration, first layer calibration, and slicer flow calibration. After printing my calibration cube, I noticed the edges of the cube were pointing outward slightly, which is a sign that linear (pressure) advance isn’t being utilized. Unfortunately the Professional Firmware that I installed does not support linear advance, so in the future I’ll be further upgrading the printer with Klipper firmware.
My First Print
Following all of this, I finally was able to make my first print. As the printer came with a $10 off coupon for Inland filament, I bought a spool of Microcenter’s Inland White Marble Tough PLA to try and print some pots out of, as well as a cheap textured PEI sheet for $10.
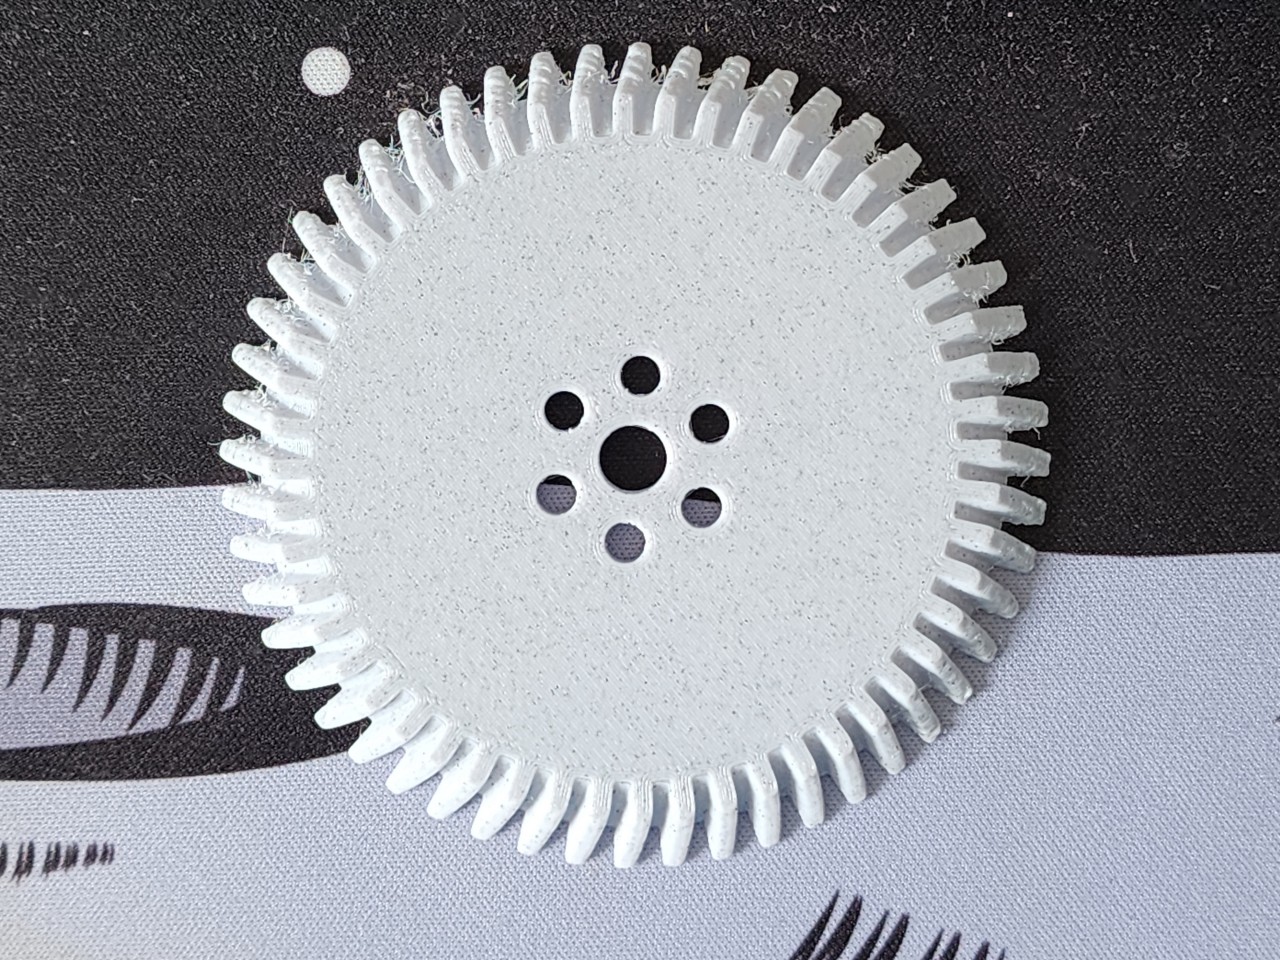
I initially wanted to print this small spiral planter, but after a couple of failed attempts, I concluded that the cooling fan was insufficient for the sharp overhangs at the base of the pot.

The picture above shows the bottom of one of the failed print attempts in the orientation of the printer bed. There is severe stringing and bulging layers at the top, whereas the print closest to the image bottom is well-detailed without stringing. The filament cooling fan on the Ender 3-S1 only blows from the bottom direction upward, which explains why the print quality on overhangs is good when facing the fan but very poor when facing away from the fan. I addressed this issue with a cooling mod, which I will blog about in a future post.
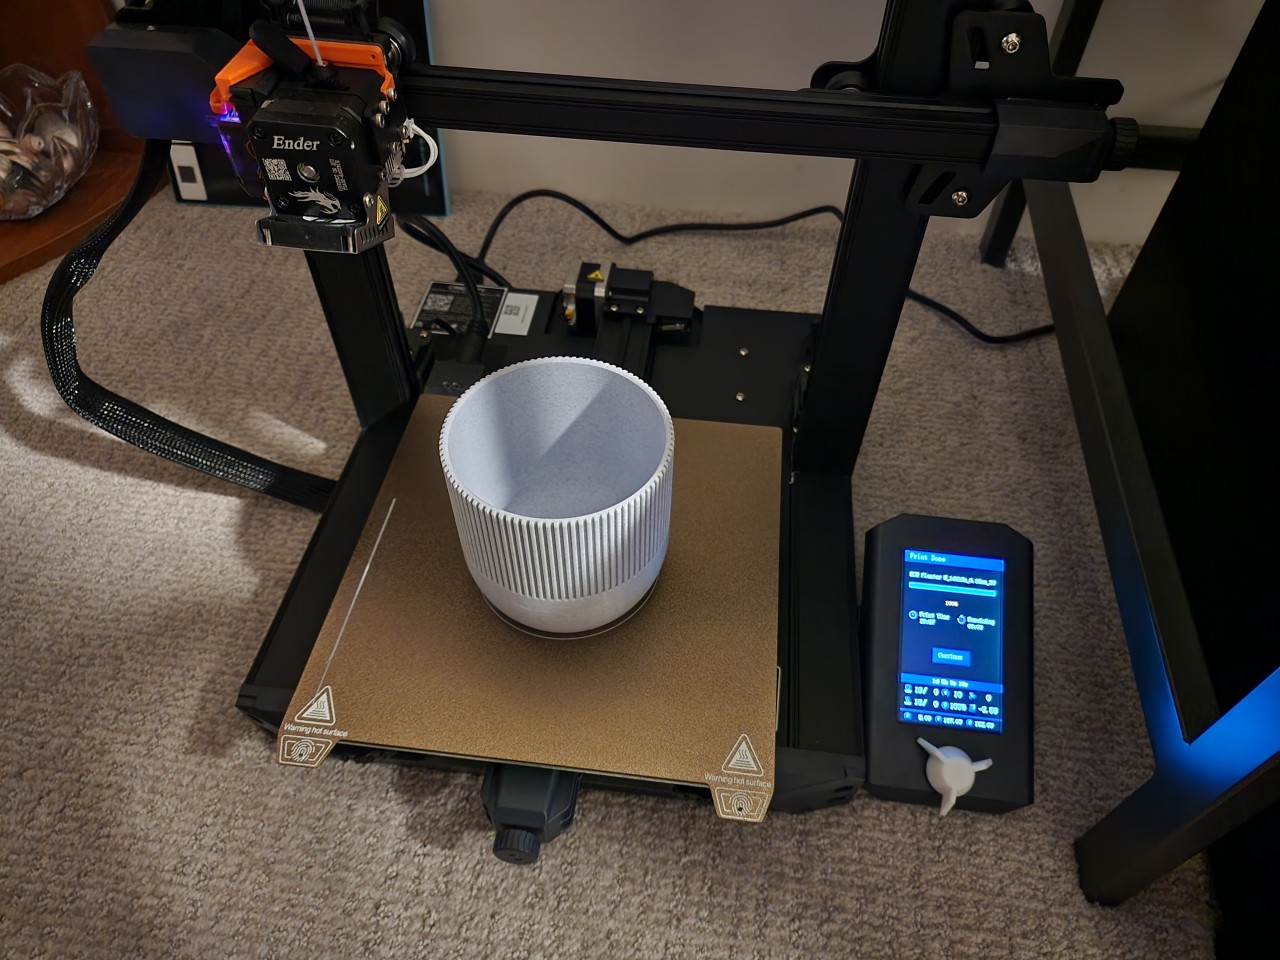
Instead I printed the medium-sized pot from this design. The print took me more than a day, but was ultimately successful!

My print settings were as follows:
- Filament: Inland Tough PLA, Marble White
- Layer height: 0.16 mm
- Infill: 10% gyroid
- Print temp: 210 for the first layer, then 205 for subsequent layers


