
Daily Driving Vim as a Text Editor for Biomedical Research
When I transitioned to an 16” MacBook Pro as my work computer for research, I gave up an indispensable tool on my trusty Lenovo ThinkPads, the TrackPoint. Although I was formerly a TrackPoint skeptic myself, the ability to keep my hands on the keyboard without moving my right hand to the mouse or trackpad made working on ThinkPads so much more comfortable.
Unfortunately the MacBook Pro has no such pointing stick (Steve Jobs would probably come back alive and personally scold Tim Cook if they ever introduced that feature), and the return to constantly moving my right hand to and from the trackpad while programming in my Python and R scripts was enough to sway me to try using Vim.
Vim is a completely text-based editor for the terminal which uses the keyboard to perform all commands, from moving the cursor to inputting text. Notably, moving the cursor can be done using the H, J, K, and L keys for left, down, up, and right, meaning that my right hand doesn’t need to leave the home row at all (hooray!). Also, Vim is present on many Linux installations unlike easier-to-use text editors like nano. This has come in handy countless times when logging in to virtual machines in the cloud, especially when the virtual machine is managed by a biobank which prevents installing new software.
Vim Tips and Tricks
Here are some useful commands I found on the way while figuring out how to use Vim:
- Vim comes with a nice tutorial,
vimtutor, which goes over the basics of movement and editing. Vim certainly doesn’t have an easy learning curve, but I felt comfortable enough to use it instead of Sublime Text after about a couple of weeks. - On macOS, you’ll probably want to install the latest version of Vim using HomeBrew to get support for the latest features.
- You can open a terminal pane inside of Vim in normal mode with the command
:terminal, which by default opens a horizontal terminal pane. To open a vertical terminal pane, use:vertical terminalinstead. To move your cursor in the terminal window, useCtrl-WN. You can open and close withexitas many terminal panes as you want. - Switch your cursor between panes using
Ctrl-Wfollowed by the direction you want to move (h,j,k,l). - When you yank (i.e. copy) text with
y, the contents are copied by default to the"register (i.e. a place to store text in memory; there is a great post on Vim registers here). If you have terminal windows open you can easily yank text from a script, move the cursor into the terminal pane, and paste it withCtrl-Wfollowed by"". - On Linux and macOS, you can yank text to the system clipboard with
"+y. - While
jandkmove down and up a line respectively, if a line wraps around and you want to move the cursor directly down or up, usegjorgkrespectively.
Customizing Vim
Unlocking the full potential of Vim requires customizing it with a .vimrc file, which is usually located in the home directory. I start by customizing my .vimrc with the options below (note that this file is written in Vimscript, which uses " for comments), which should give some sensible defaults (change the number of spaces for the tabs to your liking).
" Vim Configuration File

" General Behavior
" Disable compatibility with vi
set nocompatible
" When on, splitting a window will put the new window below the current one
set splitbelow
" When on, splitting a window will put the new window right of the current one
set splitright
" The value of this option influences when the last window will have a status line
set laststatus=2
" Indicates a fast terminal connection
set ttyfast
" Enable syntax highlighting
syntax enable
" Enable filetype-specific indentations and plugins
filetype plugin indent on

" Appearance
" Print the line number in front of each line
set number
" Show the line and column number of the cursor position, separated by a comma
set ruler
" Highlight the screen line of the cursor with CursorLine
set cursorline
" When on, lines longer than the width of the window will wrap and displaying continues on the next line
set wrap
" Wrap long lines at a character in 'breakat' rather than at the last character that fits on the screen
set linebreak
" If in Insert, Replace or Visual mode put a message on the last line
set noshowmode
" Show (partial) command in the last line of the screen
set showcmd
" When a bracket is inserted, briefly jump to the matching one
set showmatch
" The value of this option specifies when the line with tab page labels will be displayed:
set showtabline=2
" Show autocomplete options when typing Vim commands
set wildmenu

" Editing
" Influences the working of <BS>, <Del>, CTRL-W and CTRL-U in Insert mode
set backspace=indent,eol,start
" Copy indent from current line when starting a new line
set autoindent
" Round indent to multiple of 'shiftwidth'
set shiftwidth=4
" Number of spaces that a <Tab> counts for while performing editing operations, like inserting a <Tab> or using <BS>
set softtabstop=4
" In Insert mode: Use the appropriate number of spaces to insert a <Tab>
set expandtab
" Maximum number of changes that can be undone
set undolevels=1000

" Search
" Ignore case in search patterns
set ignorecase
" Override the 'ignorecase' option if the search pattern contains upper case characters
set smartcase
" When there is a previous search pattern, highlight all its matches
set hlsearch
" While typing a search command, show where the pattern, as it was typed so far, matches
set incsearch
Vim can also be augmented by installing plugins. You’ll need to make sure the Vim version you’re using (check with vim --version) is later than 8.0 (on the Broad Institute’s cluster I had to compile Vim myself… why is the Broad still using RHEL 7.0!?). Simply clone the GitHub repositories of the plugin you wish to install into ~/.vim/pack/plugins/start (the start folder can be changed to any name you like, as you can group plugins into folders of your liking; I just put them all into start). Some top plugins I like to have include:
- Nerdtree: An awesome file explorer plugin that allows you to browse and open files from within Vim.
- Lightline: Allows for cool-looking custom status lines.
- fzf: Fuzzy file finder (integrates super quick file searches into Vim).
- CoC: Enables auto-completion. Some useful CoC extensions (heh) include:
- coc-highlight: Highlights hex color codes
- coc-pairs: Double parentheses, quotes, brackets, etc.
- coc-pyright: Python auto-completion
- coc-r-lsp: R auto-completion
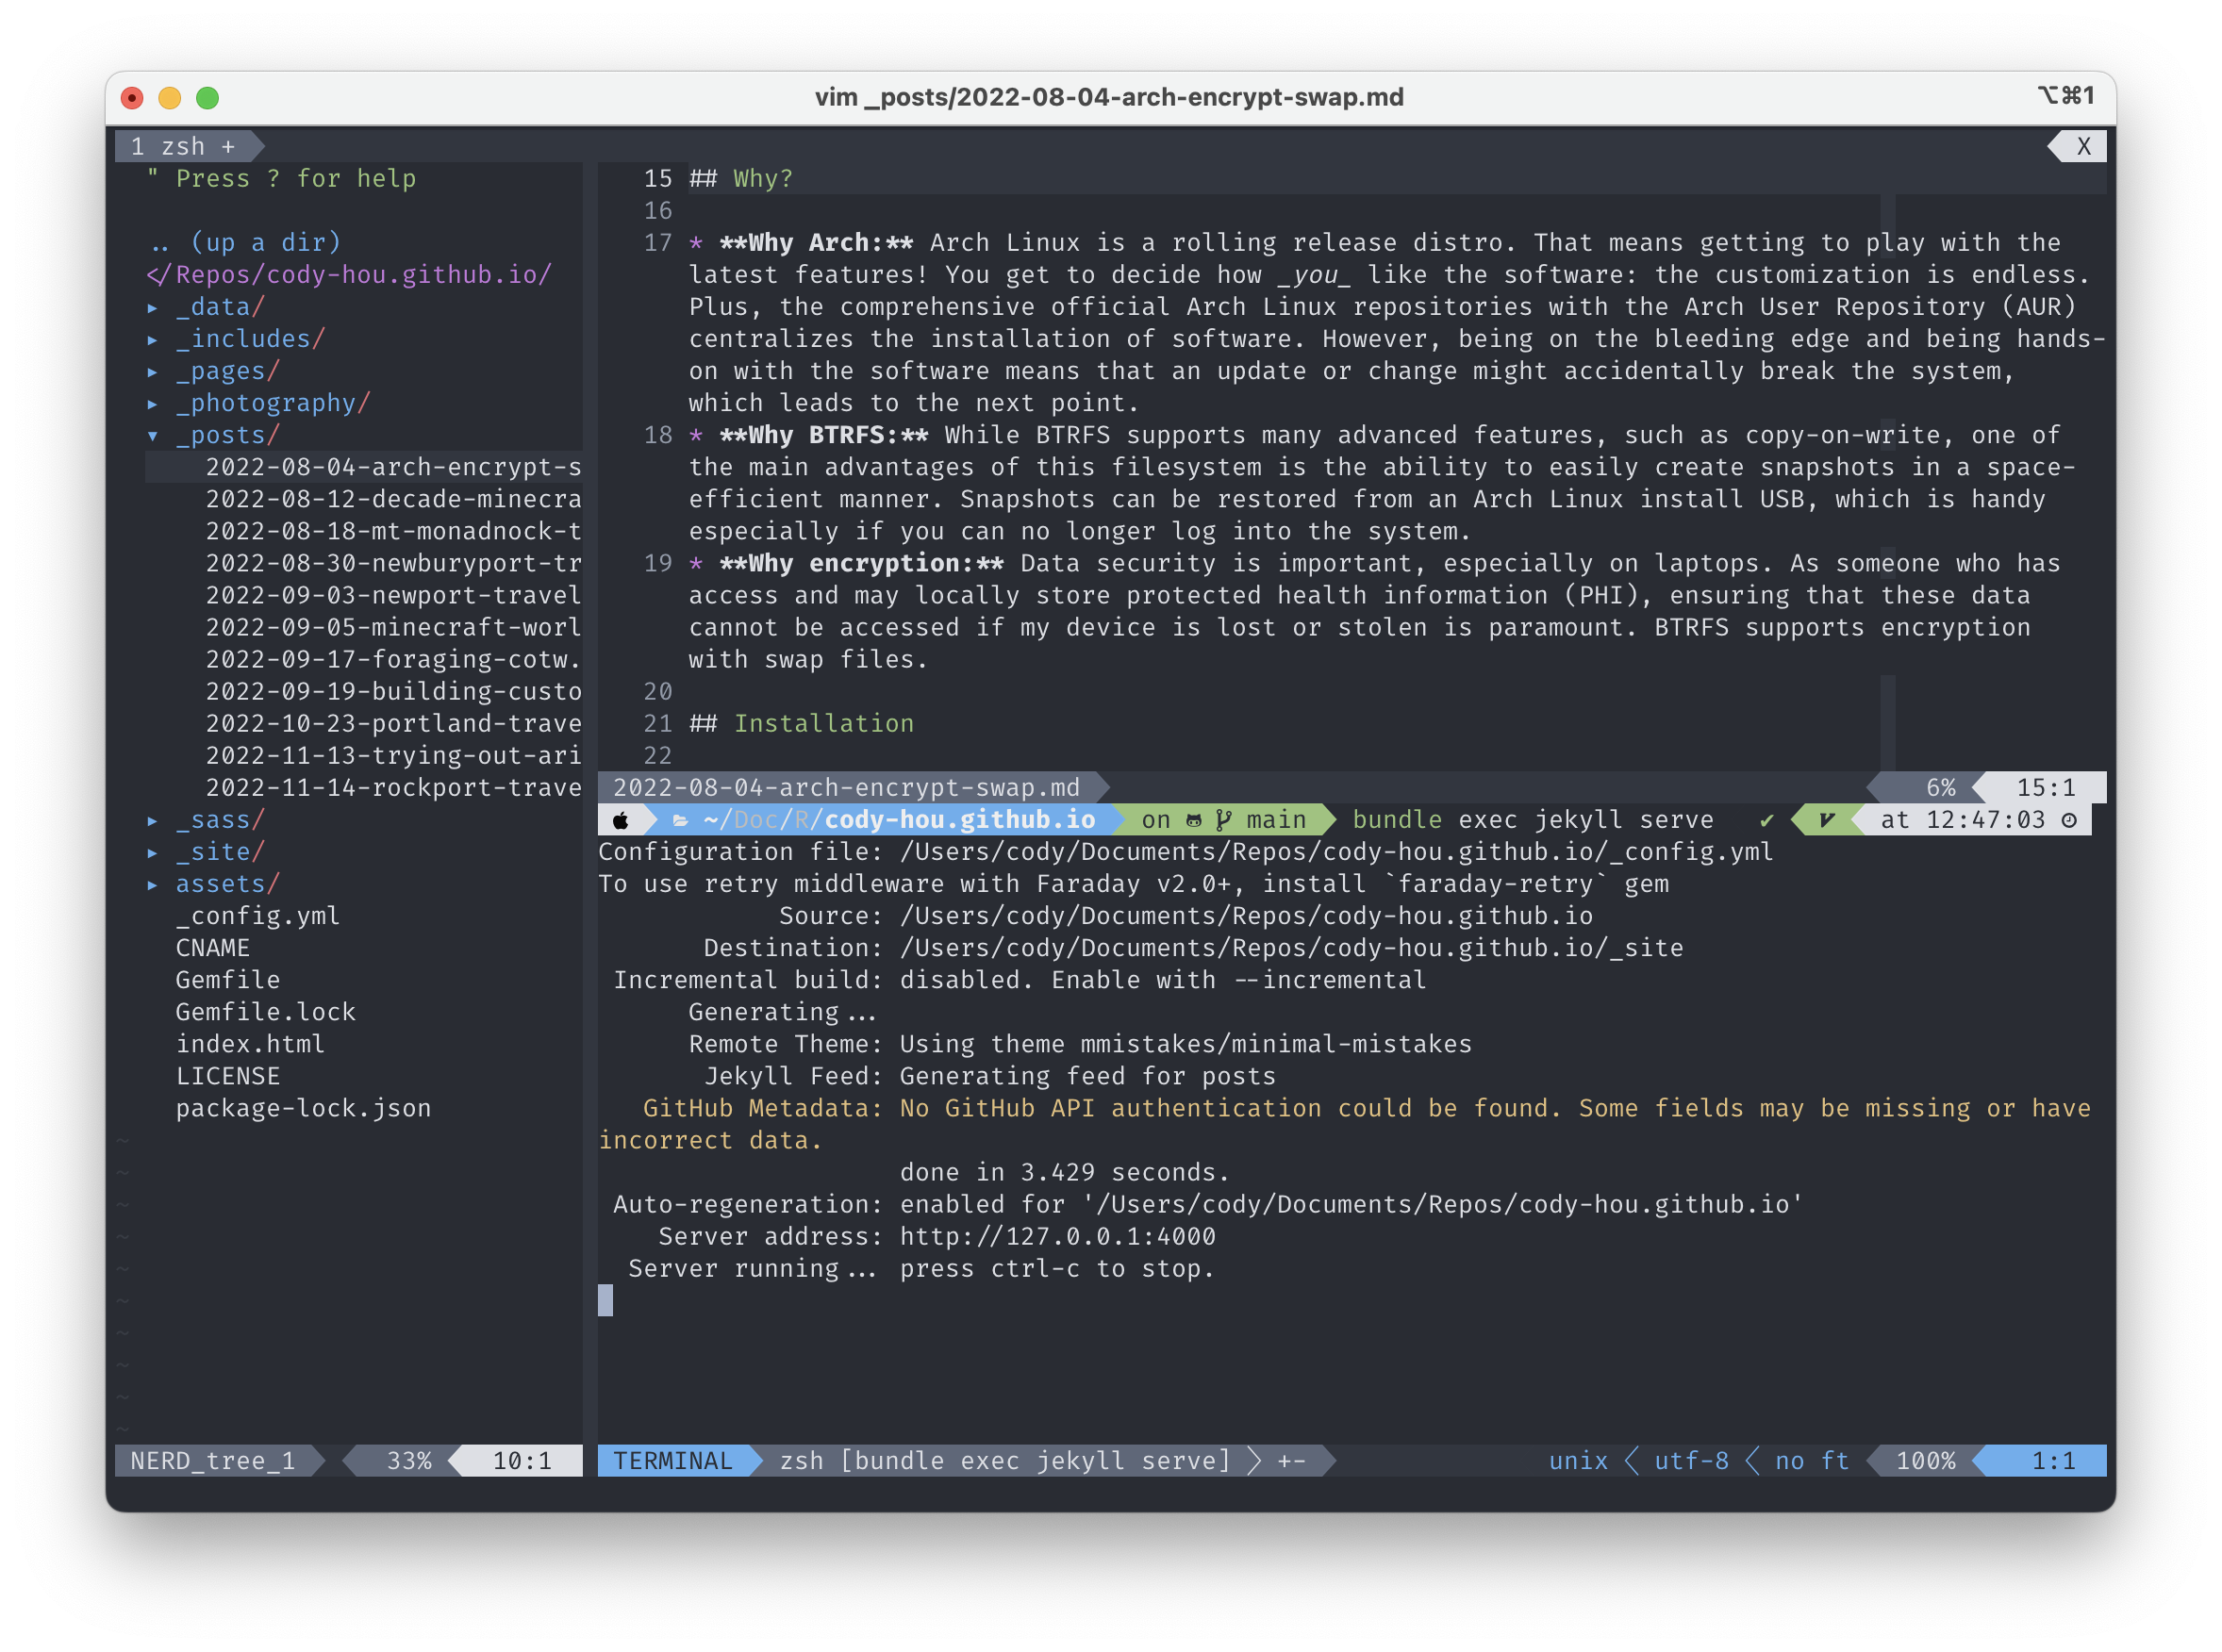
In addition, you can also spice up Vim by using color themes. I personally use OneHalf Dark for its vibrant colors and pleasing cool color scheme. It’s also well-supported in the terminals that I use (Konsole on Arch Linux and iTerm2 on macOS), so my terminal is consistent throughout.
Here is my additional configuration for the above plugins (note that I use FiraCode Nerd Font; also the +termguicolors option on macOS requires a newer version of Vim than what it comes default with):
" Set colorscheme
set t_Co=256
colorscheme onehalfdark
if exists('+termguicolors')
  let &t_8f = "\<Esc>[38;2;%lu;%lu;%lum"
  let &t_8b = "\<Esc>[48;2;%lu;%lu;%lum"
  set termguicolors
endif
" Set colors for terminal inside of Vim
let g:terminal_ansi_colors = [
  \'#282c34', '#e06c75', '#98c379', '#e5c07b',
  \'#61afef', '#c678dd', '#56b6c2', '#dcdfe4',
  \'#282c34', '#e06c75', '#98c379', '#e5c07b',
  \'#61afef', '#c678dd', '#56b6c2', '#dcdfe4' ]

" fzf Configuration
" On macOS, installed with HomeBrew
set rtp+=/opt/homebrew/opt/fzf

" Lightline Configuration
let g:lightline = {
      \ 'colorscheme': 'onehalfdark',
      \ 'separator': { 'left': "\ue0b0", 'right': "\ue0b2" },
      \ 'subseparator': { 'left': "\ue0b1", 'right': "\ue0b3" },
      \ }

" If using CoC, use the Lightline configuration below instead
function! CocCurrentFunction()
    return get(b:, 'coc_current_function', '')
endfunction

let g:lightline = {
      \ 'colorscheme': 'onehalfdark',
      \ 'active': {
      \   'left': [ [ 'mode', 'paste' ],
      \             [ 'cocstatus', 'currentfunction', 'readonly', 'filename', 'modified' ] ]
      \ },
      \ 'separator': { 'left': "\ue0b0", 'right': "\ue0b2" },
      \ 'subseparator': { 'left': "\ue0b1", 'right': "\ue0b3" },
      \ 'component_function': {
      \   'cocstatus': 'coc#status',
      \   'currentfunction': 'CocCurrentFunction'
      \ },
      \ }

" NERDTree Configuration
" Start NERDTree. If a file is specified, move the cursor to its window.
autocmd StdinReadPre * let s:std_in=1
autocmd VimEnter * NERDTree | if argc() > 0 || exists("s:std_in") | wincmd p | endif
" Exit Vim if NERDTree is the only window remaining in the only tab.
autocmd BufEnter * if tabpagenr('$') == 1 && winnr('$') == 1 && exists('b:NERDTree') && b:NERDTree.isTabTree() | quit | endif
" Close the tab if NERDTree is the only window remaining in it.
autocmd BufEnter * if winnr('$') == 1 && exists('b:NERDTree') && b:NERDTree.isTabTree() | quit | endif
" Open the existing NERDTree on each new tab.
autocmd BufWinEnter * if getcmdwintype() == '' | silent NERDTreeMirror | endif

" CoC Configuration
" You should copy what is written in the example configuration on the documentation here:
" https://github.com/neoclide/coc.nvim
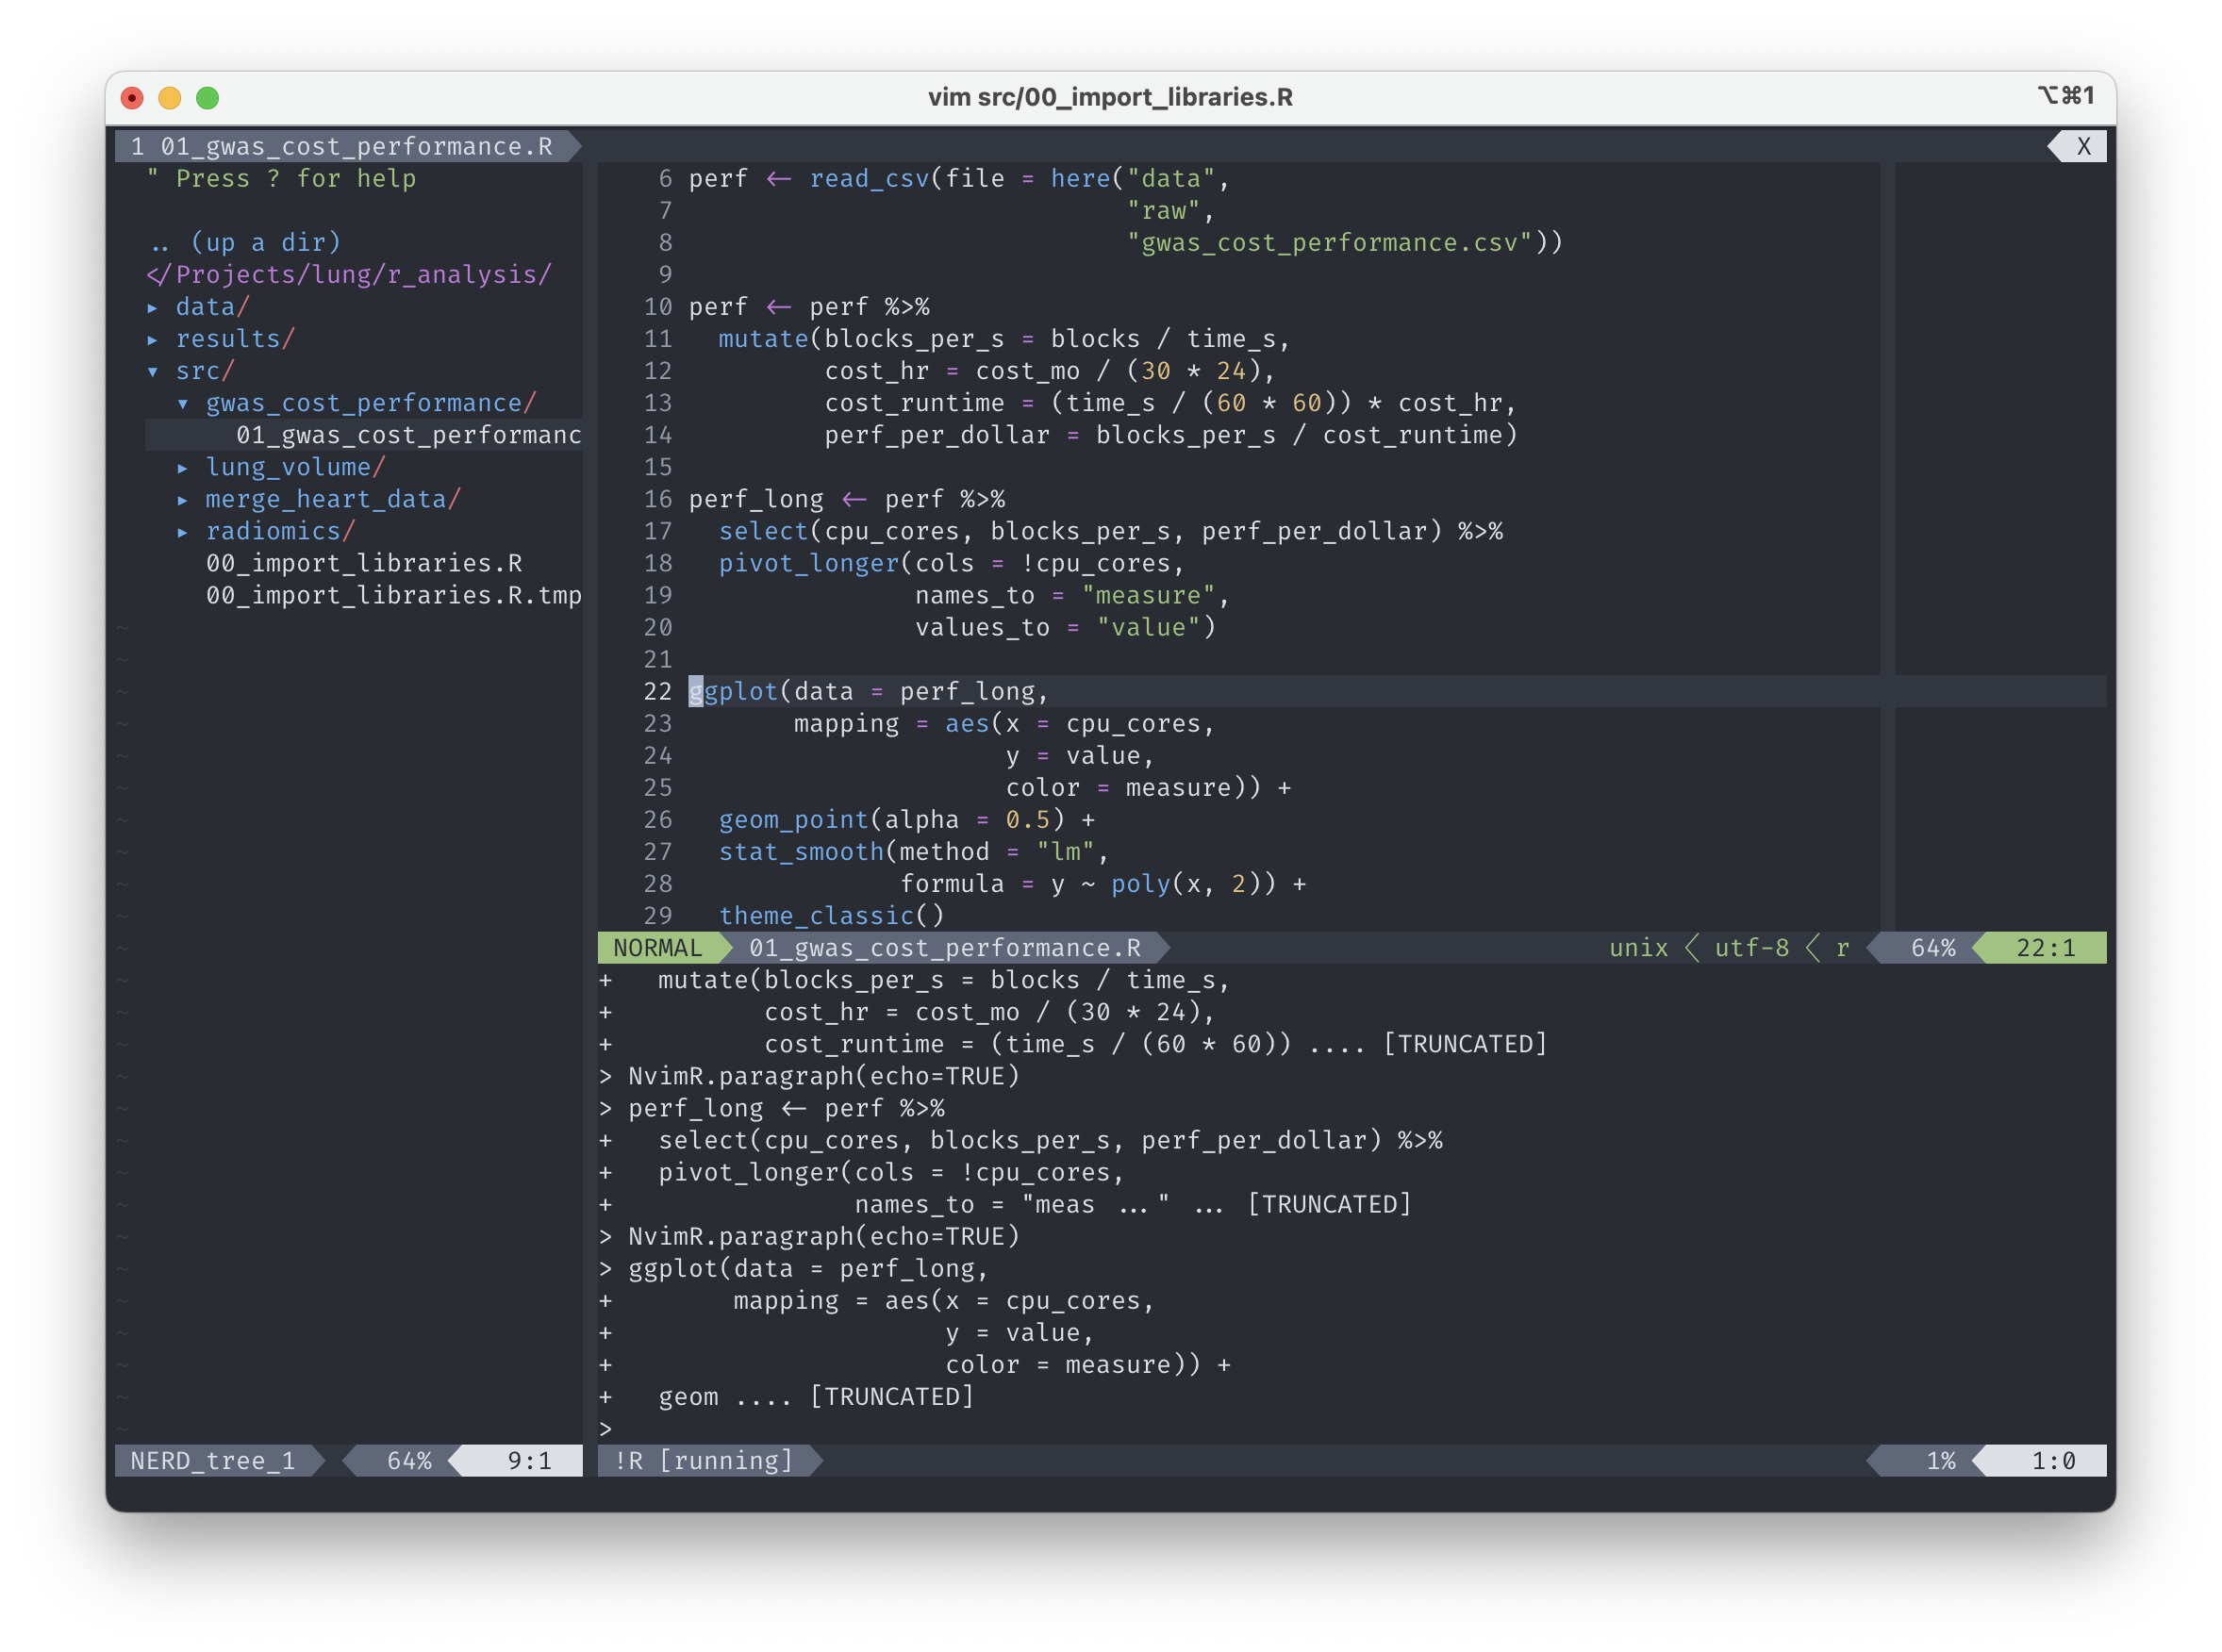
Vim as an R IDE
A lot of the computational work in biomedical research utilizes R, so having an efficient system to send code to an R terminal is necessary. Luckily there exists just a Vim plugin for that: Nvim-R!
The documentation on GitHub is pretty thorough, though there are a couple of options that you may want to set in your .vimrc:
" Nvim-R Configuration
" Enable commenting
let R_enable_comment=1
" Set <- shortcut to two _ presses instead of one
let R_assign=2
Also, with the .vimrc settings above, tabs will be four spaces instead of R’s default two. To mitigate this we can create ~/.vim/ftplugin/r.vim which will be autoloaded any time an R file is loaded with the following configuration:
" Set spacing for R files
setlocal shiftwidth=2
setlocal softtabstop=2
setlocal tabstop=2
I hope that someone may find this compilation of rambling and resources useful.