
Building My First Custom Mechanical Keyboard
A coworker introduced me to the obsessive world of custom mechanical keyboards—and I’ve been hooked since. While I’ve been using mechanical keyboards since 2014 (currently the Varmilo VA108M Sea Melody with Cherry MX Blue switches), the prospect of putting together my own mechanical keyboard seemed daunting and not worth the effort in the past.
To be fair, there was a kernel of truth in that assumption. First, the selection of switches (the part under each key that registers each keystroke) was much sparser then, and prebuilt keyboards were largely dominated with switches manufactured by Cherry (creators of the Cherry MX switch line). Nowadays, the switch market is booming with different types and feels of switches, and finding a non-Cherry MX switch is all too common. Second, putting together a mechanical keyboard used to require soldering switches onto a PCB. Now, “hot swap” PCBs can be purchased with sockets that allow for easy installation and switching of different types of switches.
My reasons for building a custom mechanical keyboard (or rather, how I convinced myself to justify my purchases) were two-fold:
- For my Sarnoff research year, I work on my computer 8+ hours a day, which means the keyboard is the primary means by which I’m conducting research. While the Broad gives us Apple keyboards to use, I was unsatisfied by their scratchy sound and flat keyboard profile. Good tools improve the overall work experience and make it fun.
- It looks and sounds cool lol
Component Selection
After doing some quick searches on YouTube, it was easy to just order a setup that looked or sounded cool; however, I came up with the following checklist of personal wants for my keyboard.
- Form factor: I don’t use the number pad often at work, but I do use the function keys frequently for adjusting brightness/volume on my Macbook Pro, as well as the delete, home/end, and page up/down keys while editing manuscripts. Based on this, a 75% form factor board was best for me.
- Switches: I knew that I type best on tactile switches, but also needed them to be quiet (most tactile switches are loud and noisy) as to not distract my coworkers.
- Aesthetics: I wanted the keyboard to match aesthetically.
- Features: For whatever reason I wanted a rotary knob on my keyboard since that’s the new cool keyboard fad.
- Availability: I wanted something in stock (which isn’t the case for a lot of keyboard components).
I eventually opted for the following components for a silent office keyboard build (here is a good overview on the anatomy of a keyboard):
- Frame/PCB: Akko Mod 007S V2, a south-facing1 75% keyboard kit with a knob in a sleek space gray colorway; comes with aluminum and polycarbonate plates, as well as lots of foam to dampen sound
- Switches: Gazzew Boba U4, an extremely silent tactile switch that doesn’t require lubing to sound/feel good
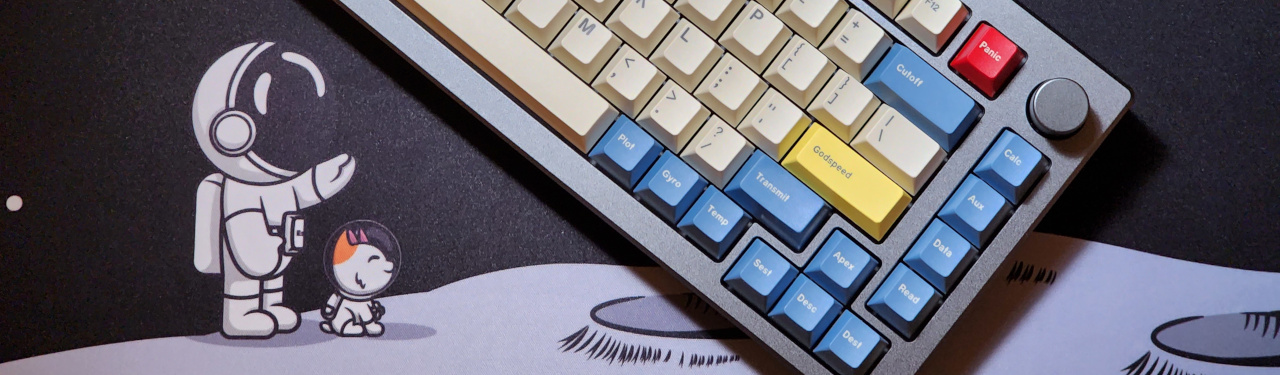
- Keycaps: GMK Godspeed Armstrong, to match the space gray of the keyboard (I had also purchased some Osume Tsukimi keycaps as well; I’ll keep these for another build)
- Stabilizers: Durock V2, a popular screw-in stabilizer on the market; honestly there are a lot of better options these days though2
- Desk mat (for home): Keycadets With Love, Cats edition, to keep with the space theme
Building the Keyboard
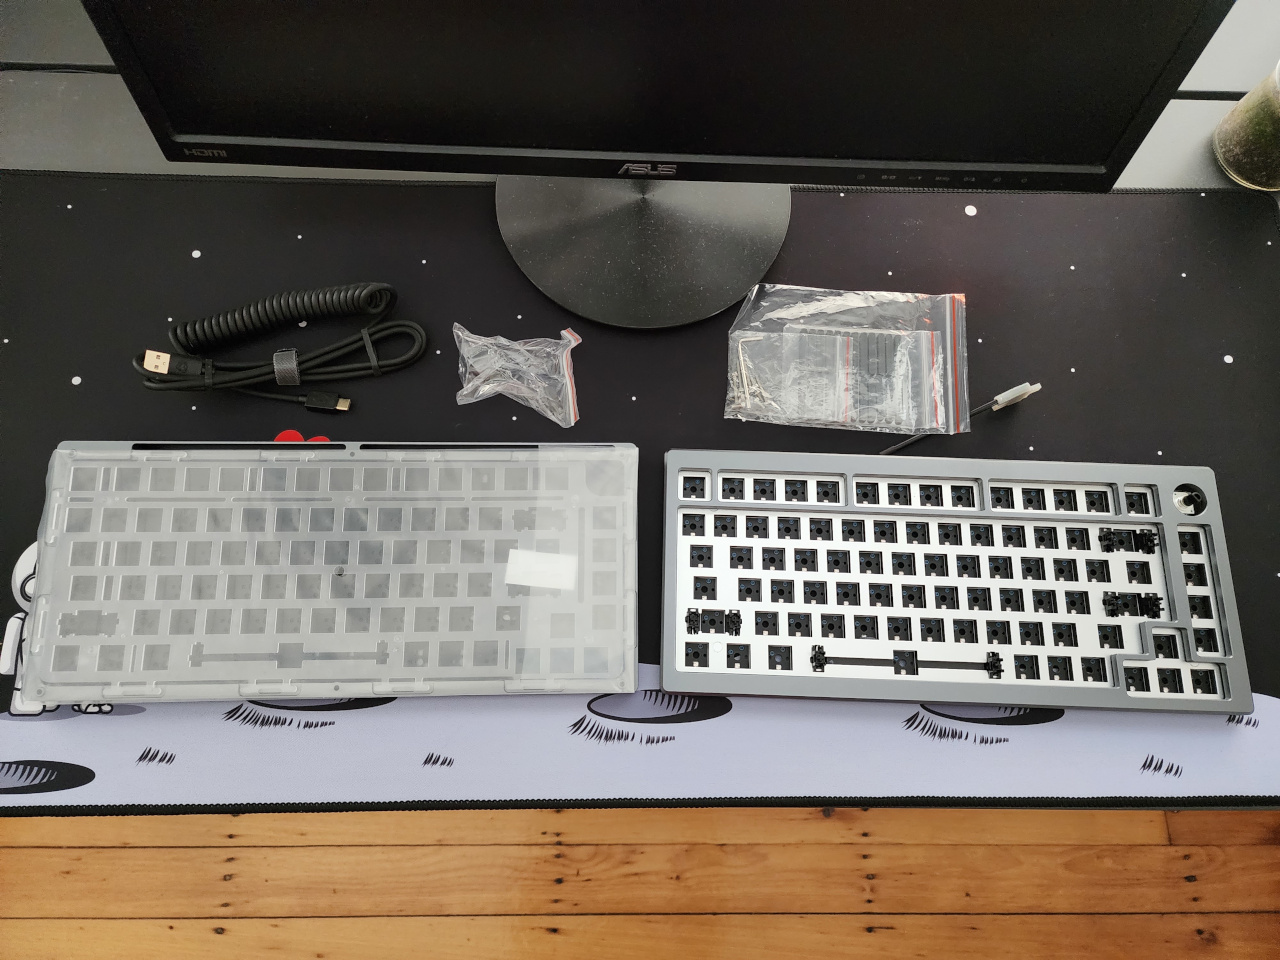
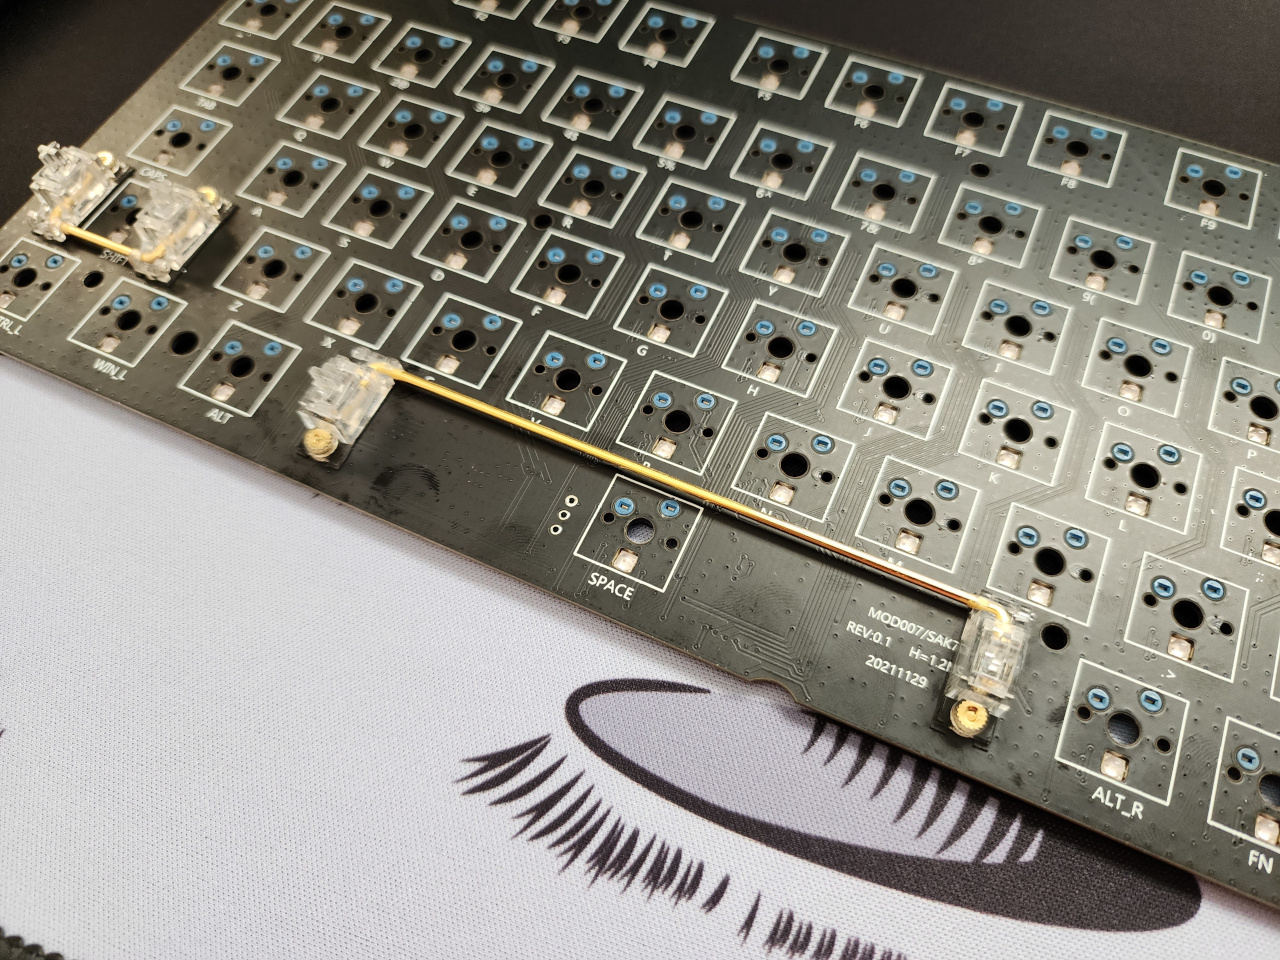
After a two-week wait, the keyboard kit finally arrived all the way from Shenzhen, China. The kit includes the aluminum top and bottom frames, the PCB itself, aluminum and polycarbonate plates, case foam (to put between the bottom frame and PCB), poron foam (to put on top of the PCB, but under switches), plate foam (to put between the PCB and plate, on top of the poron foam), a set of plate-mounted stabilizers, rubber and poron gaskets, USB-C connector daughterboard, a coiled USB-C cable, and screws with an Allen key.
Since I wanted to use my own screw-in stabilizers and the softer polycarbonate plate, I disassembled the factory-assembled PCB-aluminum plate sandwich. Before installing my stabilizers, I performed the Holee mod3 to reduce rattle using films from KPRepublic and lubed the stabilizers with Krytox 205G0. Since the Durock V2 stabilizers are designed for 1.6mm PCBs and my PCB is 1.2mm thick, I had to also use some stabilizer stickers (also from KPRepublic) to reduce any wobble. The poron film went over this, and then the stabilizers screwed into the PCB.
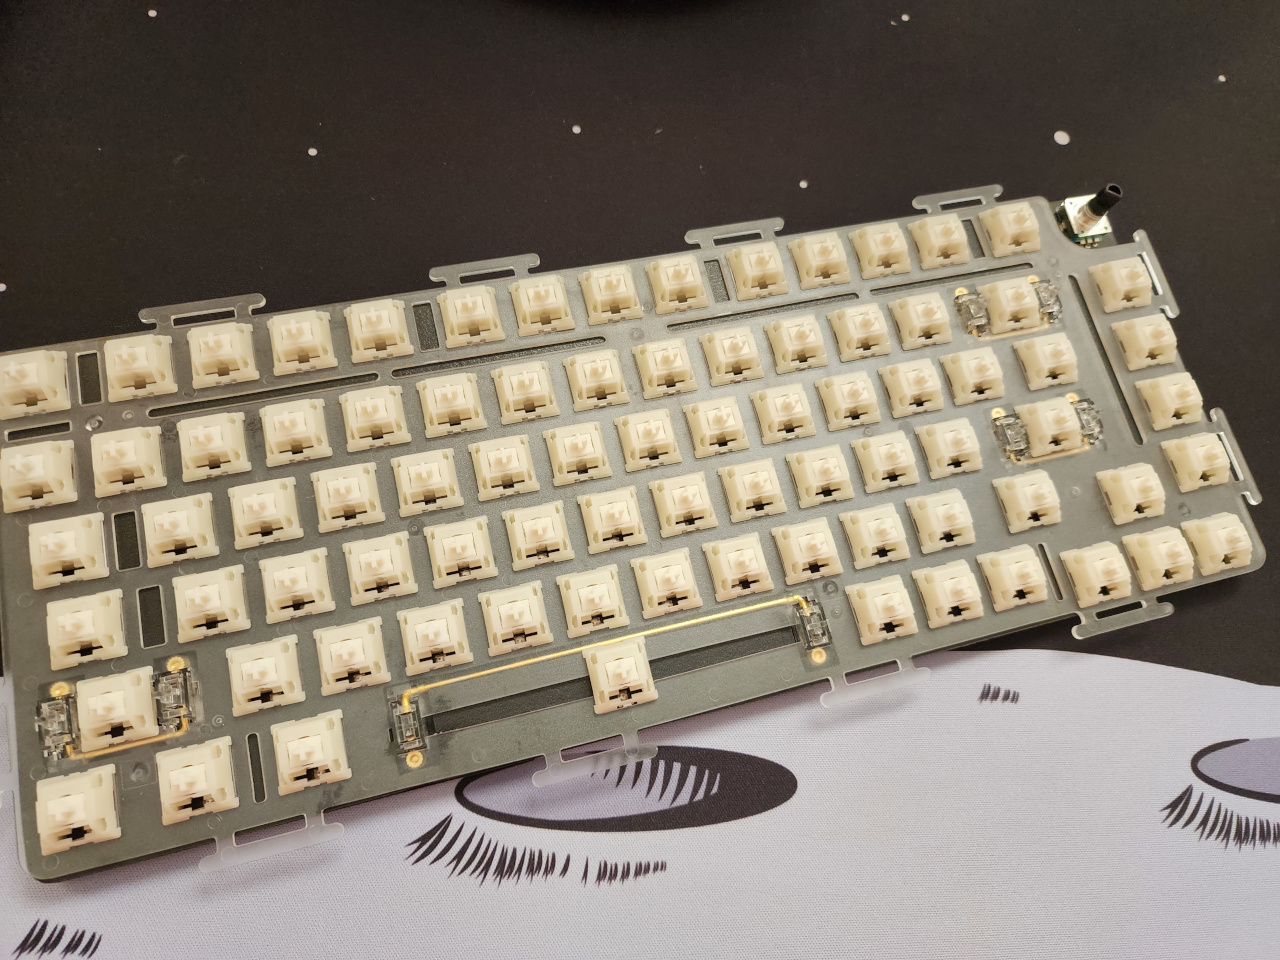
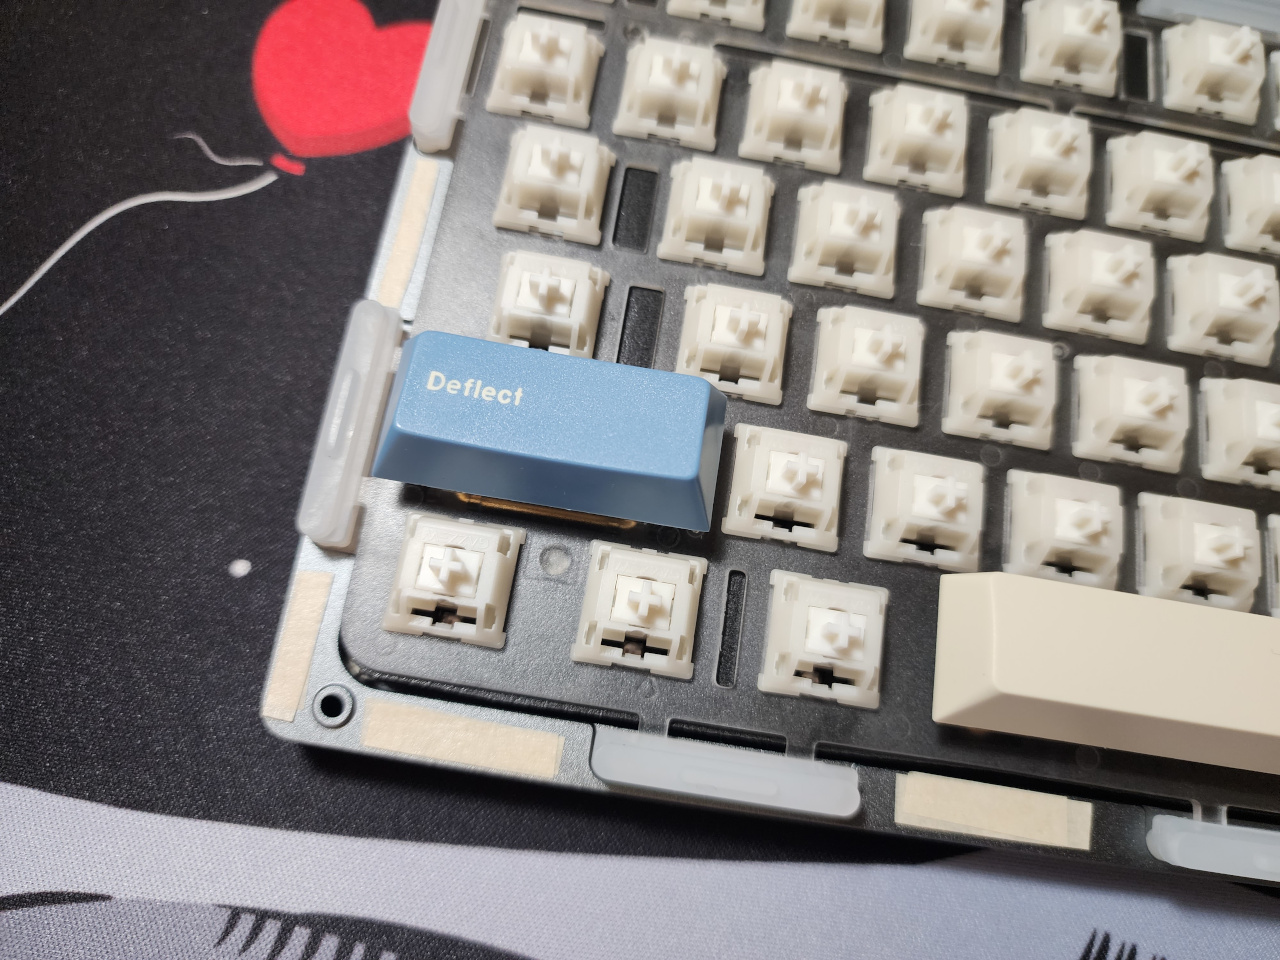
After I was happy with the stabilizers (tested with their respective keys), I placed the plate foam, polycarbonate plate, and installed the switches into the board. The plate fits tightly around the stabilizers so I’m not even sure if the stabilizer foams were necessary.
The keyboard was almost ready to go into the frame. I applied two layers of masking tape to the back of the PCB (tape mod) to deepen the sound and reduce high-pitch noises, and then applied masking tape to where the top and bottom aluminum frames contact to reduce metal pinging noises (force break mod).
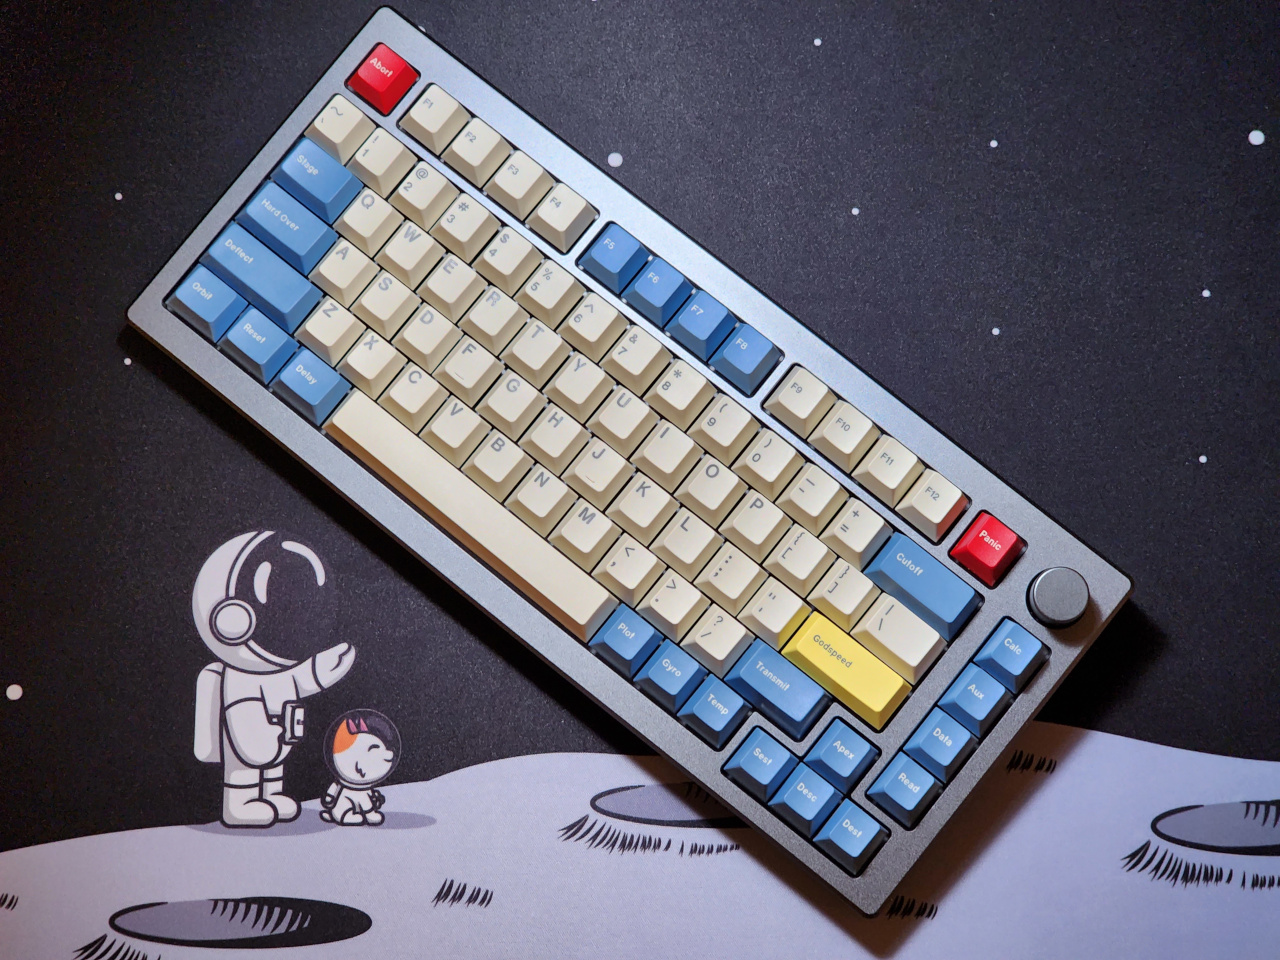
Finally, I was able to install the keycaps and screw the top and bottom halves together. Below is the final result:
And as is typical with new keyboard builds, here is a sound test (note that the sound here is not exactly representative of what it sounds like in real life):