
Repairing My ATH-M30X Headphones
Tradition dictates that I start some sort of project during my winter off. I decided to repair my Audio Technica ATH-M30X headphones that I’ve had since high school.
Although not the greatest sounding pair of headphones in the world (I now rely on my Etymotic ER4XR in-ear monitors for critical listening), the ATH-M30Xs were my first introduction to what good quality headphones could sound like. After eight years of ownership, the leather pads were flaking apart and uncomfortable to wear. The headphone jack was also bent, and everyday usage had stressed the adjacent wire. Plus, the original three meter (9.8 feet!) length of cable was far too long.
I purchased the following items for my repair. With the education discount on B&H, everything came to under $30, much less than buying a equivalent- or better-sounding replacement.
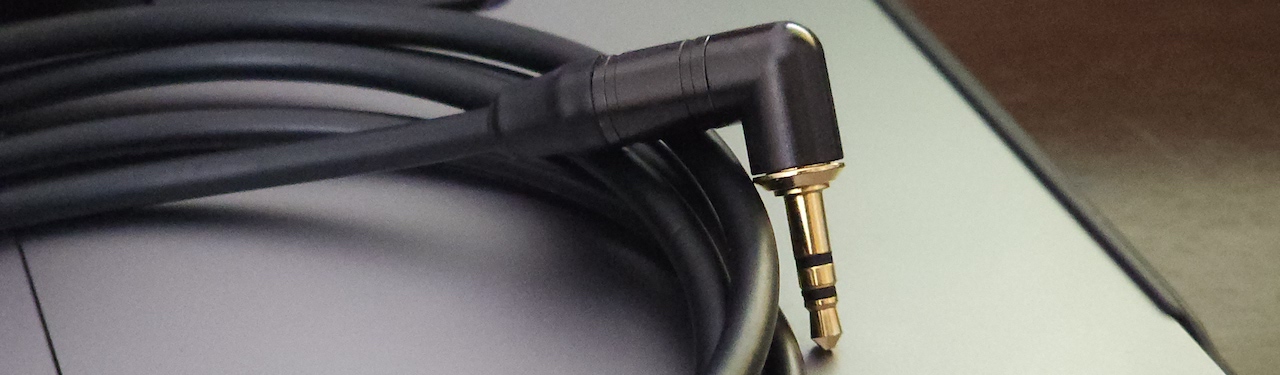
- Neutrik 3.5 mm Right-Angle Plug (NTP3RC-B): a right angle plug to prevent the repaired cable from developing the same wire strain; this plug also has holes for the left and right channels, which is much easier to solder with than the straight plug version that Neutrik’s sister brand Rean produces
- Auray Sheepskin Leather Earpads for Audio Technica M-Series (EP-ATHM50-L): a set of earpads that should be more comfortable than the originals while keeping the original profile (changes in the thickness can affect bass)
Proceed at your own risk! This procedure will void your product’s warranty.
First, I cut the headphone cable to a length of five feet two inches (I gave myself the extra two inches in case I messed up). At this stage you’ll want to put the sleeve on the cable (you can’t do this once the connector is soldered on). I then exposed the three inner wires using wire strippers. The cable is quite rubbery and is comprised of two layers of insulation, so it took some wrestling with to expose the wires.
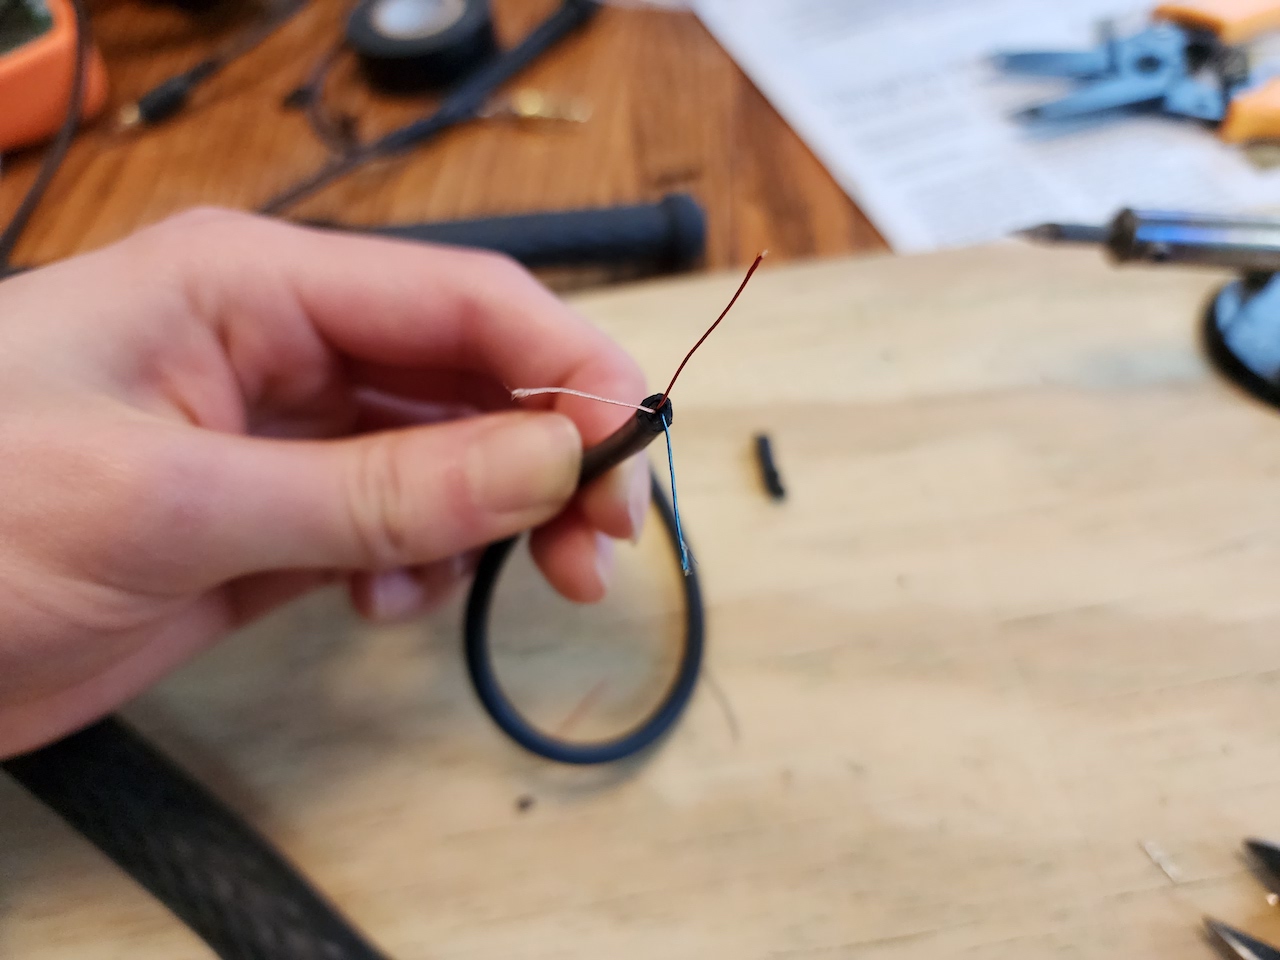
There should be one copper, red, and blue wire each corresponding to ground, right, and left, respectively (this arrangement may vary on your headphone model). The wires are covered in a thin layer of insulation that needs to be burned off (you will not get a circuit on a digital multimeter if you do not burn the insulation off). Tinning the wire with the soldering iron solves this issue.
With some help, I then soldered the wires to their respective contacts on the 3.5 mm plug (documentation available here). It wasn’t an easy first solder job, and I highly recommend having some soldering helping hands to hold the wire and plug. I used this video guide as a reference. Make sure to double check which solder points correspond to each part of the plug. After soldering, I wrapped some of the connections with electrical tape to prevent shorts.
Finally, I switched the earpads for the new ones, and voila!
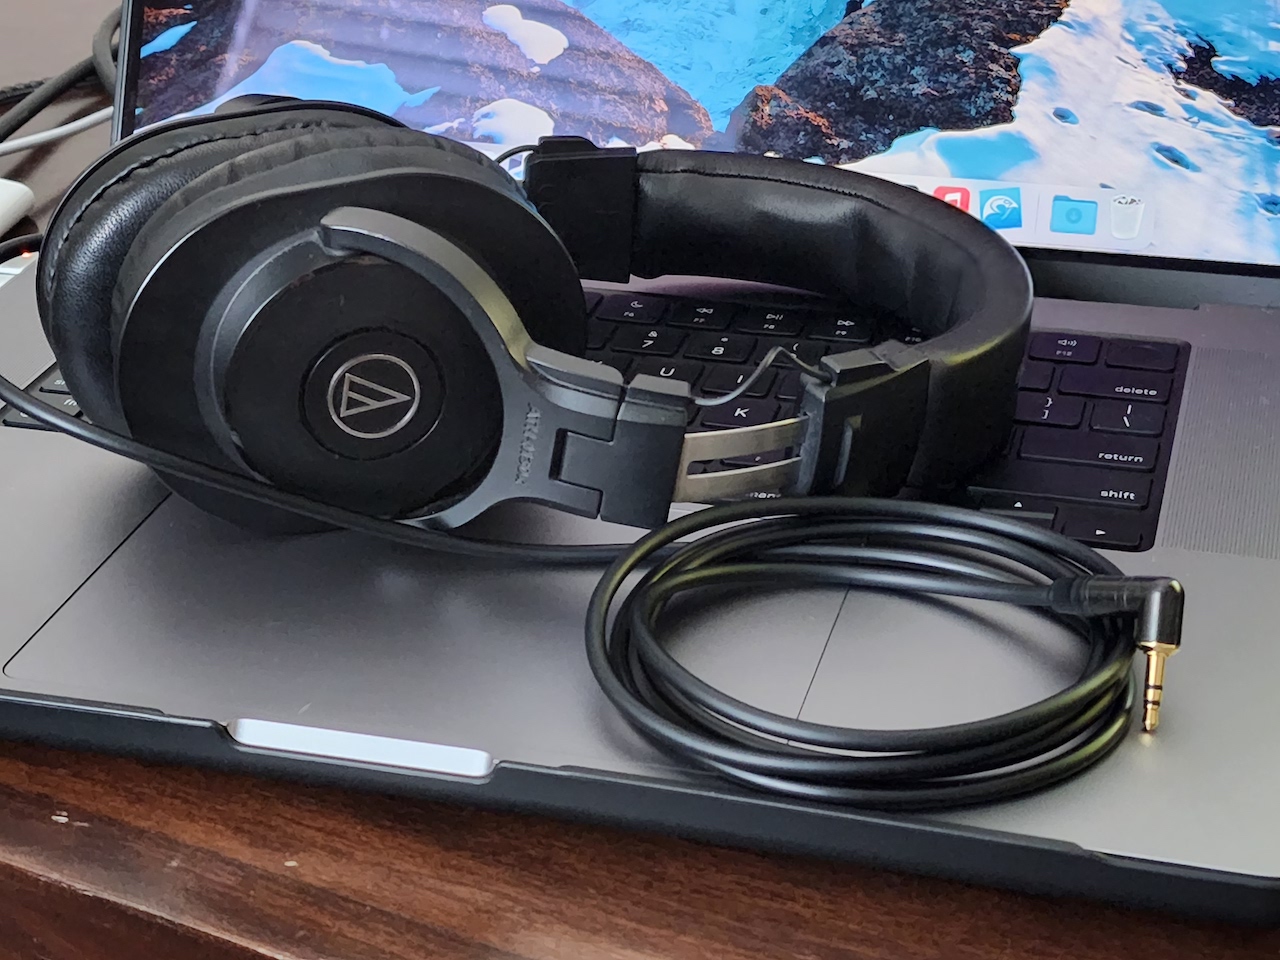
The new length of cable is far more reasonable, and the Neutrik plug is well built. My ears don’t get hot anymore with the sheepskin leather earpads. I still enjoy using these headphones as they are much lighter on my head than wireless headphones like the Sony WH-1000XM3 and are comfortable to wear with glasses.
Reduce, reuse, recycle… and right to repair is a key part of this. Take that, wireless-audio-products-destined-to-be-e-waste-with-no-reasonable-repair-or-battery-replacement-methods!